
Want to back one Mac up to another? Or do a backup of a Macbook to an iMac? Or a Mac desktop? Whether you have a Macbook Air, a Macbook Pro, a Mac Mini or an iMac, here’s how to make Time Machine back up one Mac to second Mac, instead of a Time capsule or other external drive, and how to get Time Machine to recognize the target Mac or Macbook as a valid backup disk.
The main issue which stymies people is trying to get Time Machine to ‘see’ the other Mac or Macbook that is on the network as a valid disk to which to backup the Mac on which Time Machine is running.
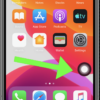
You can see the target Mac listed on the network in Finder:
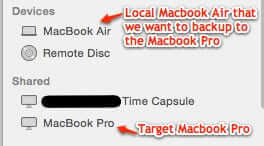
But when you try to select it as a backup disk in Time Machine, it’s not there.
The Internet Patrol is completely free, and reader-supported. Your tips via CashApp, Venmo, or Paypal are appreciated! Receipts will come from ISIPP.
CashApp us

Venmo us

Paypal us

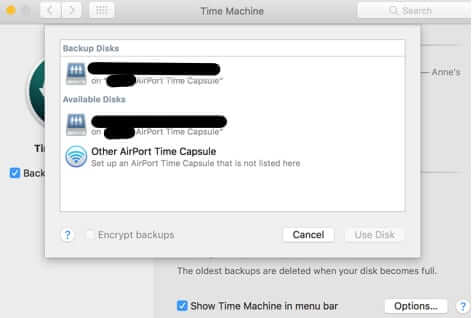
You may have already tried the “Other Airport Time Capsule; Set up an Airport Time Capsule that is not listed here” option – and found that it does not work.

It just offers you your already existing Time Capsule, if any. And clicking on the upper-left button that says ‘Other Wi-Fi Devices” does not find your target Mac or Macbook either.
In fact, typically this will be the point at which people will either give up, or search online for help, which may well be how you arrived at this article.
So, here you go:
How to Do a Time Machine Backup from One Mac to Another Mac
Of course, the very first thing that you need to do is make sure that your target Mac or Macbook has enough disk space to accommodate the backup you are wanting to do.
For ease of reading (and writing), we will refer to the Mac or Macbook that you want to back up as the ‘source Mac’, and the Mac or Macbook to which you want to back up as the ‘target Mac’.
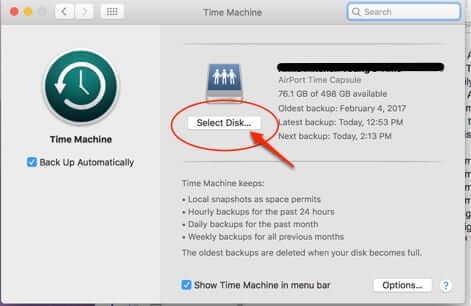
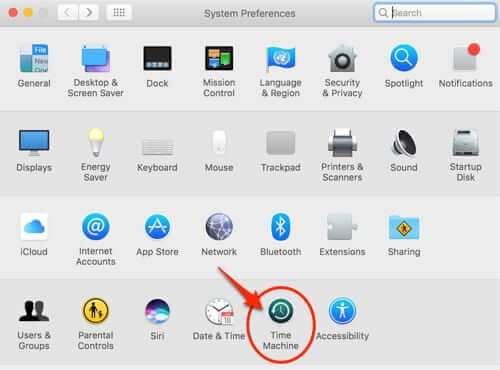
So, to make sure that your target Mac has enough disk space to accommodate the backup of the source Mac, first open your Time Machine preferences on your source Mac:
Click on ‘Options’:
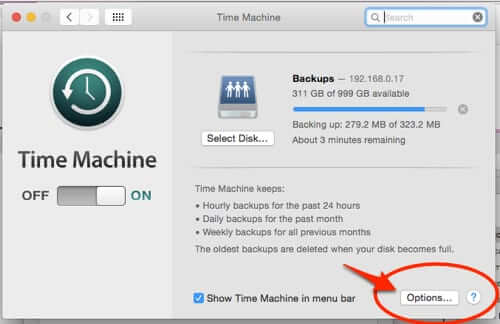
This will calculate the size of your Time Machine backup.
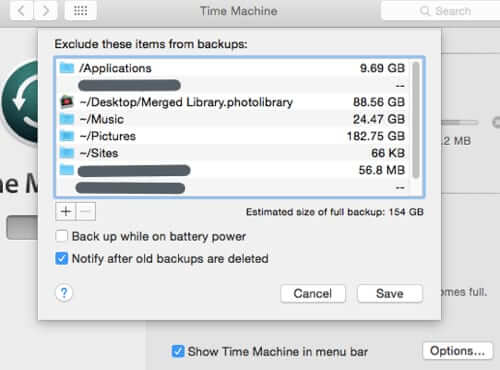
This is also a good time to exclude any directories that you don’t want Time Machine to back up. We typically exclude, for example, the Applications directory.
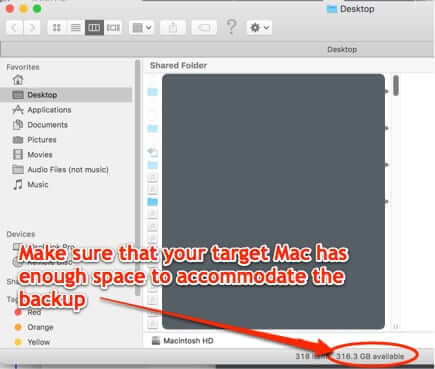
Of course to ascertain whether your target Mac has enough space on its hard drive to accommodate your backup, simply open finder on your target Mac and look at the available space, listed at the bottom of the finder window.
Now, create the directory on the target Mac to which you want your source Mac to back up.
Ok, all set? Now we get down to the actual work.
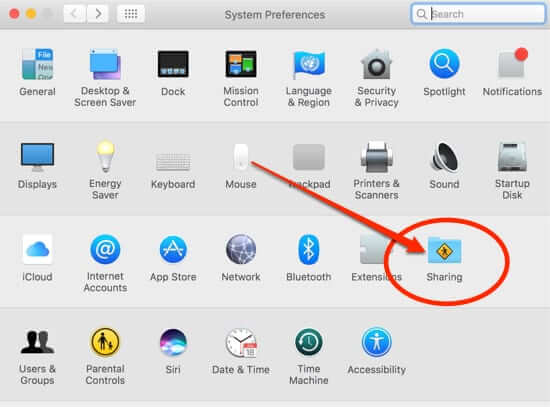
On your target Mac, in the System Preferences area, go to Sharing.
Make sure that file sharing is turned on, and that your account (the admin account) has both read and write privileges (which of course it will).
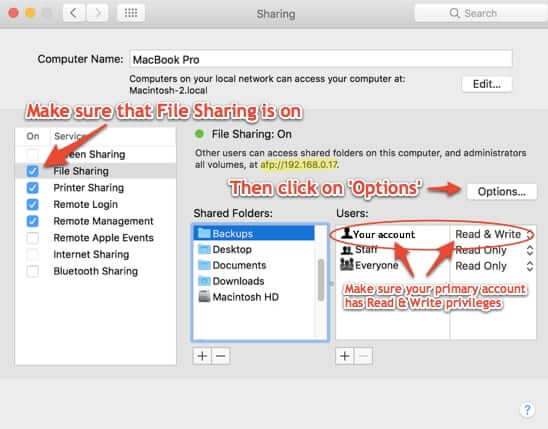
BEFORE GOING ANY FURTHER: See where it says ‘Other users can access shared folders on this computer, and administrators all volumes, at “afp://192.168.0.17” ‘??
Write down the ‘afp://’ followed by whatever IP address it is displaying’!!
In our example it is 192.168.0.17, on your Mac it may be different, write down the one that is on your Mac.
Ok, once you’re written that down, click on ‘Options’.
When you click on ‘Options’ you will see this window; make sure that ‘Share files and folders using SMB’ is not checked, and that ‘Share files and folders using AFP’ is checked.
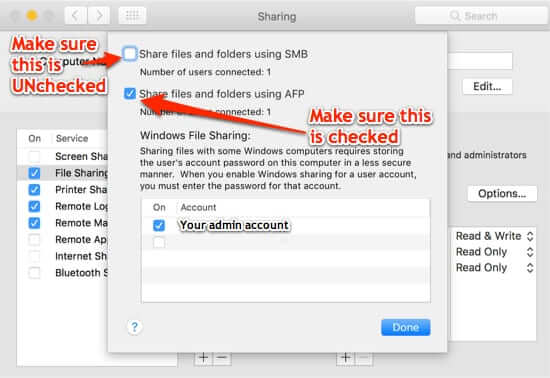
Then make sure that Windows file sharing for your account is checked “On”, not because you’re using a Windows computer, but just because that works for us and we don’t want to jinx it.
Click ‘Done’.
Now, go to your source Mac, open Finder, and in the sidebar, in the Sharing section, you should see your target Mac using your admin account on the target Mac.
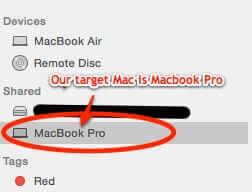
Click on your target Mac, and if you are not already connected, click on “Connect as…” and log into your target Mac.

Now, go to your Finder menu (still on your source Mac), and click on ‘Go’, and from the dropdown menu select ‘Connect to Server…’
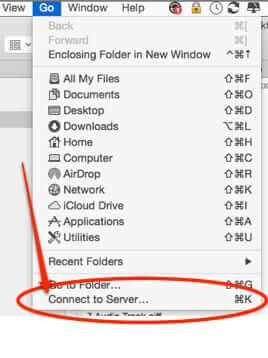
This is where you plug in that ‘afp://192.168.0.whatever-your-target-Mac-IP-addess-is’.
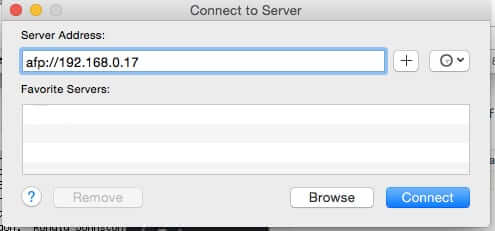
Click on ‘Connect’.
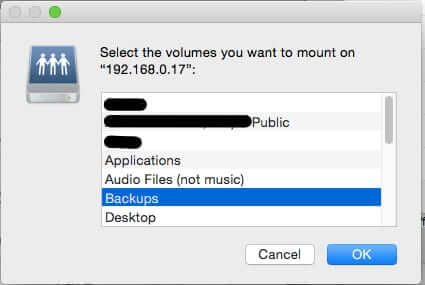
The system will ask you which volume you want to mount; select the folder that you created for your backups, and click on ‘Ok’.
Now, go to Time Machine preferences on your source Mac, and you should now see your target Mac listed as an option.

And that’s how you get Time Machine to back up one Mac to a second Mac!
The Internet Patrol is completely free, and reader-supported. Your tips via CashApp, Venmo, or Paypal are appreciated! Receipts will come from ISIPP.
CashApp us
Venmo us
Paypal us


Would leave you a tip on Apple Pay. I do not llike setting up more and more online accounts, like PayPay, Venmo, Cashapp.
Hello, thank you for the suggestion. Unfortunately setting up Apple Pay on a website involves setting up Stripe credit card processing, which is not something we are keen to do for all sorts of reasons (including visitor privacy). We appreciate the thought that you would tip us though, thank you!