
There’s no one-size-fits-all when it comes to setting up your iPhone
The best approach depends on your parenting style and what you’re trying to achieve.
If you’re looking to limit screen time, for example, you might want to consider using the Screen Time feature in iOS 12. This lets you set daily limits for app usage, as well as schedule “downtime” periods when only certain apps are accessible.
If you’re more concerned about specific content, such as explicit music or websites, then you might want to use the built-in content filters. These can be found in the Restrictions section of the Settings app. Safari is your friend as a parent. It offers various different levels of protective services for its users, one of which being the built-in pop-up blocker.
And if you want to make sure that your children are only using apps that are appropriate for their age group, then you can use the Age Rating system in the App Store. This will prevent them from downloading or purchasing any apps that aren’t rated for their age group.
Ultimately, it’s up to you to decide what level of control is right for your family. But with these tools at your disposal, you should be able to find a setup that works well for everyone involved.
Which iPhone Parental Control Setting Matches Your Parenting Style
As I’m sure you know, there is no one-size-fits-all solution for parenting either. The best way to approach parental controls for your iPhone will vary depending on the age of your child and how your family unit operates. The best way to approach this is to tailor the settings to your own parenting style.
The Internet Patrol is completely free, and reader-supported. Your tips via CashApp, Venmo, or Paypal are appreciated! Receipts will come from ISIPP.
CashApp us

Venmo us

Paypal us

So which iPhone parental control settings should you use to complement your parenting style?
If you’re not sure what parenting style you fit into, first check out this parenting style mini quiz from PsychCentral.
If you’re a more hands-on parent, you may want to consider setting up Screen Time limits for specific apps or categories of apps. This will allow you to control how much time your child spends on their iPhone each day.
For parents who want a more general approach, consider using the Do Not Disturb or Focus Mode features built into iOS. These can help reduce distractions and help your child focus on tasks at hand.
If you’re the type of parent who likes to be in control of everything, then you’ll want to use the built-in parental controls in iOS. This will allow you to set restrictions on what your child can do on their iPhone. For example, you can disable certain features, limit app usage, and block specific websites.
If you’re a more relaxed parent, then you might not need to use the built-in parental controls. Instead, you can simply set up some screen time limits and make sure that your child only has access to age-appropriate content.
No matter what your parenting style is, there are iPhone parental control settings that will work for you. It’s just a matter of finding the right ones for your family.
1. Set Up Screen Time Limits
The first thing you should do is set up screen time limits. With this setting, you can control how long your child can use their iPhone each day.
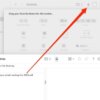
To do this, open the Settings app on your child’s iPhone and tap on Screen Time. Then, tap on App Limits. Tap on Add Limit and choose a category of apps that you want to limit.
For example, you could limit the amount of time your child can spend on social media apps each day. Or, you could limit the amount of time they can spend playing games. Once you’ve chosen a category, tap on Add and then set the time limit for that category.
2. Take Advantage of Built-in Downtime Feature
With this setting, you can control when your child can use their iPhone.
For example, you could set a rule that they can only use their iPhone during certain hours of the day. Or, you could set a rule that they can only use their iPhone on weekends.
To set up this setting, open the Settings app on your child’s iPhone and tap on Screen Time. Then, tap on Downtime. Tap on Turn On and then set the days and hours that you want this setting to be in effect.
3. Choose Which Apps Are Allowed
The next setting you should set up is which apps are allowed. With this setting, you can control which apps your child can use on their iPhone.
For example, you could allow them to use only certain apps for schoolwork. Or, you could allow them to use only certain apps for entertainment. To set up this setting, open the Settings app on your child’s iPhone and tap on Screen Time. Then, tap on Always Allowed. Here, you can add or remove apps that you want to be always allowed.
4. Set Up Communication Limits
The next setting you should set up is communication limits. With this setting, you can control who your child can communicate with on their iPhone.
For example, you could allow them to only communicate with certain people. Or, you could allow them to only communicate with people during certain hours of the day.
To set up this setting, open the Settings app on your child’s iPhone and tap on Screen Time. Then, tap on Communication Limits. Here, you can set up rules for who your child can communicate with and when they can communicate with them.
5. Set Up Content & Privacy Restrictions
The next setting you should set up is content & privacy restrictions. With this setting, you can control what content your child can access on their iPhone.
For example, you could allow them to only access certain websites. Or, you could allow them to only access certain apps.
To set up this setting, open the Settings app on your child’s iPhone and tap on Screen Time. Then, tap on Content & Privacy Restrictions. Here, you can set up rules for what content your child can access on their iPhone.
6. Set Up Locations Within Screen Time
With this setting, you can control where your child can use their iPhone. For example, you could allow them to only use their iPhone in certain places. Or, you could allow them to only use their iPhone during certain hours of the day.
To set up this setting, open the Settings app on your child’s iPhone and tap on Screen Time. Then, tap on Location Services.
7. Set Up Activity Reports
With this setting, you can see how much your child is using their iPhone, which apps they spend the most time in, and when.
To set up this setting, open the Settings app on your child’s iPhone and tap on Screen Time. Then, tap on Activity Reports. Here, you can see how your child is using their iPhone.
8. Set Up Family Sharing
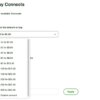
The next setting you should set up is family sharing. With this setting, you can share content, subscriptions, payment methods, calendars, notes, and most importantly, location with your family members.
To set up this setting, open the Settings app on your child’s iPhone and tap on Screen Time. Then, tap on Family Sharing.
9. Finally, don’t forget to head. to the Safari app settings to block pop-ups and explore it’s other offerings.

The Internet Patrol is completely free, and reader-supported. Your tips via CashApp, Venmo, or Paypal are appreciated! Receipts will come from ISIPP.
CashApp us
Venmo us
Paypal us