
A guide to Apple’s iPhone accessibility shortcuts for those who struggle with screens.
(Attn: This article may not be for you if you were born after the year 1983.)
The first article in this series, “Making Your iPhone Work For You”, glossed over a select few iPhone features that can make your life a bit easier (and might even make you look a bit cooler, too). As I mentioned, the iPhone is stuffed with functional features that when set up properly can turn your shiny new iPhone into your personalized magic tech-wand. You don’t have to be a wizard to make your iPhone work for you. All of the apps and features by Apple are developed with a consumer-centric approach; with the consumer being the average Joe, not some code-savvy from Silicon Valley. In order to make the magic happen, it first needs to be set up and personalized to your likening and lifestyle.
In Making your iPhone Work For You Part 1, I briefly mentioned my personal beloved iPhone feature — the easily accessible Accessibility Shortcuts. (If you aren’t familiar with how easy it is to access this menu, check out my last post for more info.)
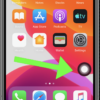
To recap, this menu can be opened by triple-clicking the side button. I should have mentioned that this is the default for any iPhone with Face-ID technology. If your iPhone has a physical Home button with Touch-ID, you can access these features with a quick triple-click of the Home button instead. So now that you know how to find these features in a flash, let’s dig in and get a little personal. The whole point of the myriad of optimizations and extensive features is to really turn your handheld device into your own dynamic tool that works for you in every sense. This is why it’s important to understand how to set it up in order to best suit your needs.
The Internet Patrol is completely free, and reader-supported. Your tips via CashApp, Venmo, or Paypal are appreciated! Receipts will come from ISIPP.
CashApp us

Venmo us

Paypal us

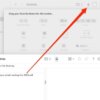
We already went over how to turn it on (triple-click, remember?) Looking at the list format menu that appears, let’s just say that what you see doesn’t suit your taste. Go to Settings and find Accessibility. The Accessibility icon has a little blue stick-figure person, kind of like the public restroom signs but not. The iPhone Accessibility settings are organized by the senses: vision, physical and motor, hearing, followed by a general category. You’ll want to scroll down to “General” and select… you guessed it! — “Accessibility Shortcut” to customize our favorite triple-clicker shortcut. Depending on your current set up, some of the listed features may have blue check marks next to them. This signifies that that option will appear when you triple click the [insert iPhone hardware] button. Simply tap on an item to select it, tap it again to deselect it. The three parallel lines on the right side can be used to re-order the features to your liking. Personally, I have small hands so I like features that I tend to turn on and off more frequently at the bottom of the list instead of at the top. The choice is all yours.
At this point you may feel a tinge of resistance. You may be shaking your head thinking ‘I don’t even know what half this stuff is!’
Keep calm. Take a few breaths.
I invite you to just play! Play with your high-tech toy! Try out all that it has to offer (within the Accessibility Shortcut Menu, for now.) There’s no need to fear.
“But I won’t be able to get it back to the way it was before!”
And that’s where you are wrong.
You know how to access the super-accessible menu at any time/from any screen.
You know which features are going to show up in this menu, because you put them there.
And just like how you selected which features will be on the menu, a simple click-on, and repeat to click-off, will get you right back to where you started. And because this menu is so super accessible for everyone, it will even tell you which features you have turned on with a bright blue check mark. So go ahead, check all the boxes, try out each and every feature until you find the ones that suit you. And then go back to the Settings and do this all over again until you get your Accessibility Shortcut Menu just right.
P.S. The accessibility features can get fairly complex in order to accommodate everyone , including people living with disabilities. If you can’t figure it out, just keep it turned off and move on. It’s still important to be familiar with all of these settings even if you don’t come to fully understand them or use it. Some day, when your phone appears to have broken, may you remember how to turn-off some weird setting and save yourself a trip to the Nerdy Bunch.
The Internet Patrol is completely free, and reader-supported. Your tips via CashApp, Venmo, or Paypal are appreciated! Receipts will come from ISIPP.
CashApp us
Venmo us
Paypal us